RENOVATION HIGHLIGHTS & LOWLIGHTS
Scroll down for photos!
What an incredible learning process this year has been. Twelve months ago, I began a renovation on my property in St Augustine. When I purchased the property, I inherited two tenants and had to wait the lease out on the main house before I could start any updates. Renovating a house is such an adventure, especially a historic one in such disrepair. It has been a process of ups and downs, surprises – both good and bad. There is no better education in house renovations, and the cost of it than spending your own money and learning from your mistakes. It also pushed me to see what I could do myself, thanks to so many videos on YouTube. Here is a little about my adventure.
JANUARY
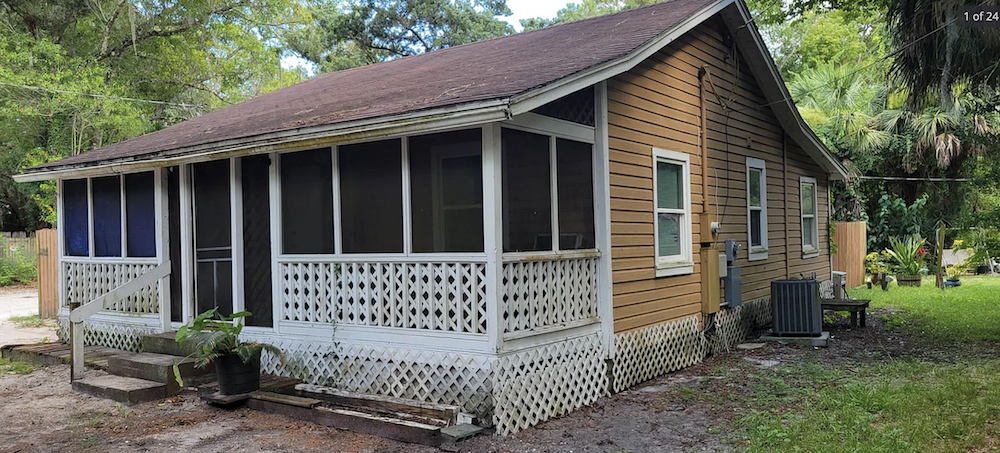
It would be easy to be intimidated by this bungalow renovation. The 80-year-old home had been neglected, was sinking on one side and was close to a tear down. I only saw it a few times on the inside to be honest as the tenant was here and had so much stuff. The whole place stunk of a nasty musty smell along with other things. The dumpster arrived and my renovation crew began the demo on the interior. Ceilings had to be removed, layers of flooring pulled out, all bathrooms, kitchen, lighting, was removed. Rotten siding was removed.
I had to hire a general contractor to handle the beam replacement under the house as it needed a permit. We soon learned that the county requires a drawing for anything structural so that had to be done before the new beam was added. In reality this was a fairly quick and straightforward process.
FEBRUARY
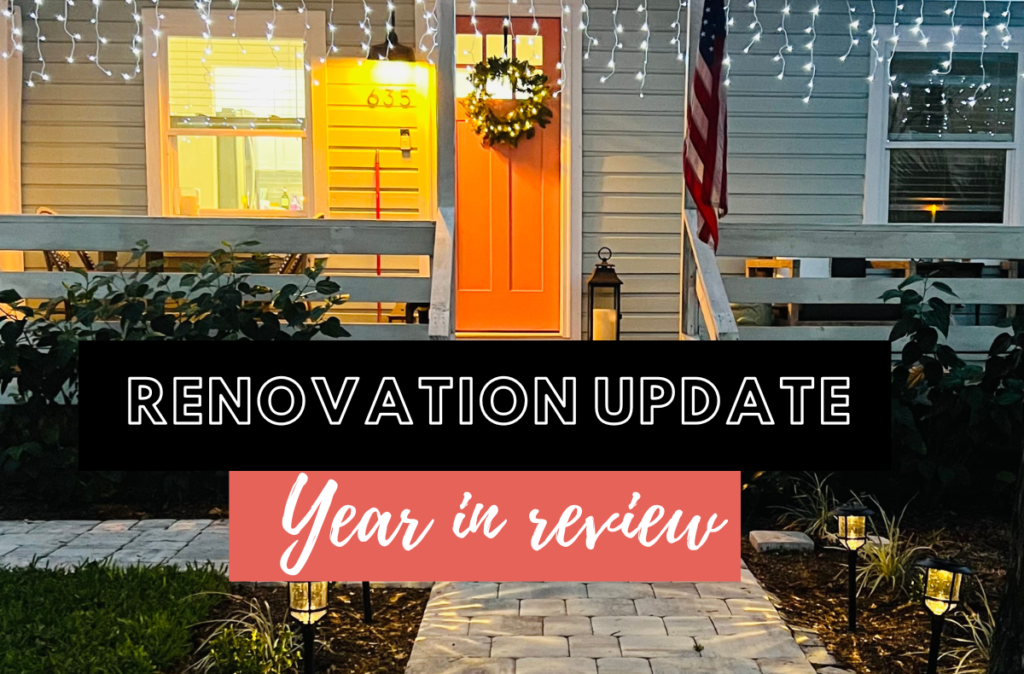
At this point the house was a shell and needed to be rebuilt from the inside out. The porch floor was completely bowed so I added a porch repair to the project, and all the beams were replaced. In these bungalows a couple of things are important to the style of architecture, and the porch is critical. Back in those days the porch was a social space; another room where people would gather and watch the world. It was then I also started to think about adding pathways to the front and how to make this cute.
On the inside the team raised the ceilings and added new drywall. I love collaborating on ideas and so in the kitchen we decided where the island should go, which walls to keep, and the practicalities needed to move appliances like the dishwasher and washer and dryer. In a small kitchen like this it was quite a work of art!
My vision for the kitchen was a modern farmhouse style, with farm sink and white countertops. I drove to Jacksonville and went shopping for quartz slabs. Not a fan of granite, I settled on the white sparkle quartz which I absolutely love. For a small kitchen like this I felt like the upgrade was money well spent and the white always looks more spacious.
Later that month, after tenting and fumigation, I moved into the house with the plan of being here to complete painting and attack the landscaping.
MARCH
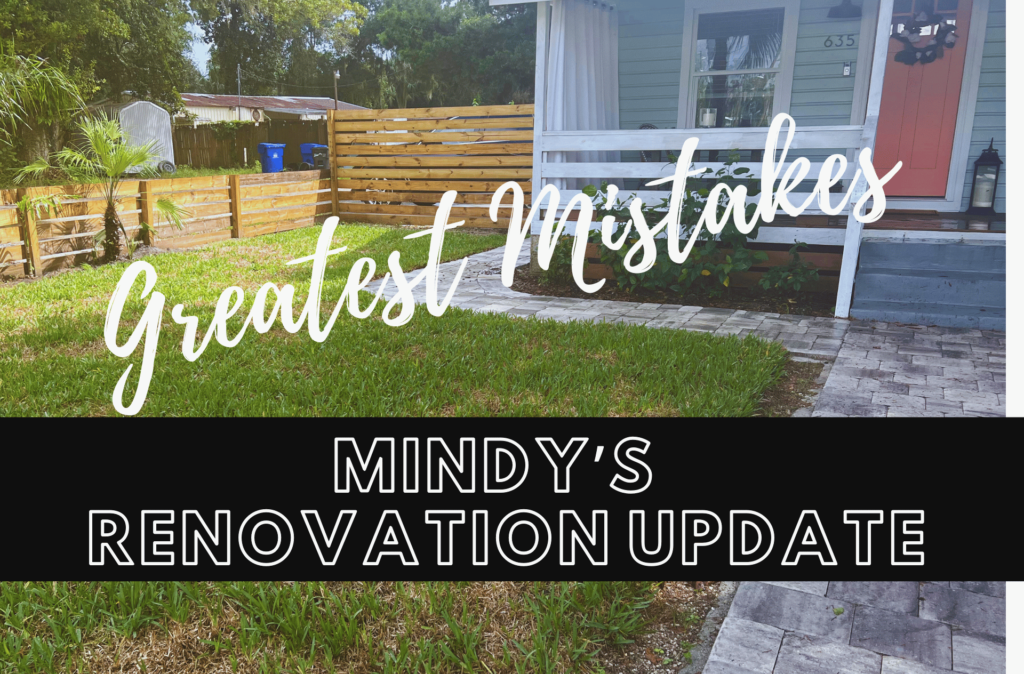
I chose a pale blue for the house, which seemed like a good idea at the time. It is common here in Florida, but I felt it was a little too coastal for the location. Due to bad prep by one of my contractors, it also started to peel off within three days. The lessons of bad prep were obvious. I was able to get a refund from the contractor and had my other renovation team begin the process again. To repaint they had to do an intensive preparation of the exterior with even more sanding and pressure washing than before. After quite a bit of study I found a pale dusty teal that I liked and had Sherwin Williams create the color.
I learned that kitchen cabinets and their installation is quite a project. I worked with DL Cabinetry to design the layout and cabinet placement and finally got all the cabinets home after picking them up in Jacksonville. Once on site, I worked with Bold City Kitchens to install everything.
My tenant in the tiny house decided to vacate which left me with another decision – should I renovate that as well while it is vacant? Figuring this may be the only time I could get in there; I went ahead with that project and at a friend’s suggestion converted it from a studio to one bedroom. This project needs a blog post of its own, but it was more expensive than I thought because we needed to relocate the kitchen and AC. The good news is that it is now a rental house that is booked by Airbnb guests most weekends and slowly paying itself off.
APRIL
At this point I learned more about old houses and luxury vinyl plank flooring. For one, I did not want carpet even though that would be easier. In our climate the LVP looks great, however floors must be completely flat. Marco and his team needed to add another layer of material under parts of the floor to enable this to work. I chose a light color to make the interior seem bigger. (it is 800 sq ft). In hindsight it does look dirty at times so maybe a darker color would have been better, especially if this becomes a rental again.
The front yard and curb appeal was important to me. Thinking about what the house may have been like in 1940, I knew it needed a front path from the porch steps and a side path. Previously there was a dirt driveway, old fence, and trash cans – absolutely no curb appeal! I had a crew remove the old fences, rework the dirt in front, and add pavers.
Fencing was another complete disaster as I chose the wrong people to do it thinking I could save money. The way the fence was constructed and because I wanted horizontal boards, meant the posts bowed after a short time. Another huge lesson and all I can say about that is to hire a professional fencing company!
MAY
Sick of walking through the dirt to get to the house I knew I needed some kind of parking area for the main house. It also didn’t help that I drove my car into a power pole in the middle of the property completely forgetting it was there. What a disaster! The parking pad was added along with a path to the house.
AUGUST
Buy August it was time to get some sod for the front lawn. After the fencing disaster I thought that calling a professional sod company would mean no headaches. Unfortunately, I was wrong.
SEPTEMBER
The sod started to die within 5 weeks. It started in patches and soon one side of the pathway was completely dead. The sod company at first said it was a bug that came in a storm that ate the roots, then blamed me for overwatering. My pest company said it was the sod that was infected by this bug. I have just left it at this stage, but it is painful to spend the money and have it look so awful.
OCTOBER
Another lesson I learned about this was about aesthetics and the view into the neighbors. After a storm the neighbor’s fence blew down revealing the old mobile homes and an old rusty shed. At this point after a couple of tiny guests complaining about being uncomfortable with the neighborhood, I knew I had to do something.
NOVEMBER
Taking no chances, I called Matanza Fence and they added an 8ft fence along the back yard and also fixed the gates in the front which by then were falling apart. This high fence has completely transformed my back yard and I love the privacy. It feels like a world away from the situation around the property.
DECEMBER
This month I had another lightbulb moment. Not wanting to use the white plastic lattice that seems traditional for the underfloor trim of these bungalows, I found a product at Lowes which looks so much better. This trim has completely changed the front of the house and it is well worth doing for the look!
Overall, the year has been twists and turns between this project, and my other property in Lincolnville, also in need of attention. On the positive side, there is no better way to get educated being a real estate professional than going through this and learning firsthand.
I am excited to take my design and project management skills to the next level in 2024 and offer investors the opportunity to invest with me on these projects. Stay tuned!
BEFORE AND AFTERS


